|
S.S.
RHODESIA STAR |
|
|
|
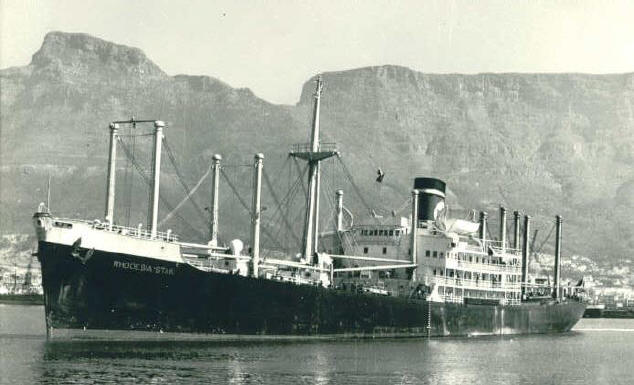
All those years ago, even before we sailed from London, I decided that one day, I would build a model of the ship. She was not any great beauty, having been built in the United States of America in1943 as the Escort Carrier U.S.S. ESTERO. She was quickly transferred under lease/lend to the Royal Navy and served on the arduous Arctic convoys to Murmansk as H.M.S. PREMIER. After the war, she was converted into a cargo passenger liner (12 passengers) and sold to the Blue Star Line, of London and renamed RHODESIA STAR. When I look at pictures of the old ship today, she still impresses me with her businesslike appearance, bristling with Samson posts, derricks and rigging. Since those far-off years, I have sailed in some of the finest passenger liners in the world, but still, the old ship has a place in my heart. I can not with any truth say that I enjoyed my first voyage. The ship was old, uncomfortable and the food was not up to much. But I could have stood all that without a qualm. What wore me down more than anything, was the fact that a small minority of my fellow officers left no stone unturned to make life miserable for me as I was the youngest officer aboard. I was forbidden to speak to the crew and the passengers and I had to leave the officer’s lounge by 2100 every evening. Despite everything, I made some good friends aboard, mostly among the engineering officers. Graham, a young New Zealand junior, Henry another junior and Ted, the junior 4th. Also pantry boy Terry, now a successful businessman with whom I am still in touch. The pen in front of my models, incidentally, was given to me my the senior radio officer, Hugh, who also remains in touch. Hugh taught me well and stood me in good stead for the future with plenty of sound advice on how to get along at sea. Despite all the trials and tribulations of the round voyage to Australia, I was (and still am) always immensely proud that my sea career began in such a powerful looking ship of the Old School. --0--- |
|
The S.S. RHODESIA STAR leaving Cape Town. |
|
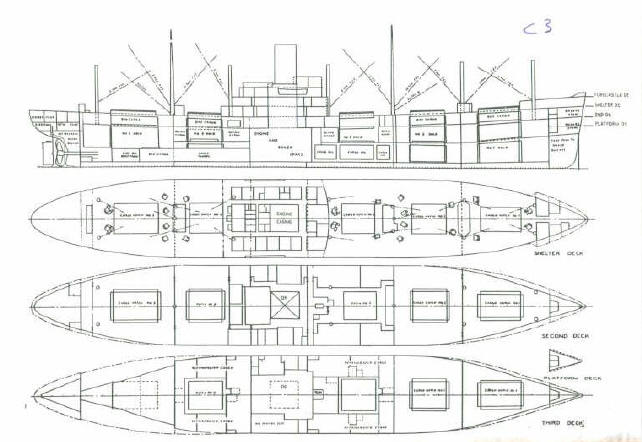
Eventually, I found a sparse general arrangement plan for a C3 cargo ship (See attachment) which showed the profile, deck and hatch sizes. With a large number of photographs plus the benefit of my memory, I was able to bring enough information together to build an accurate model. I cannot remember where I found the plan apart from the fact that it was in an ancient technical publication. I reproduce it in good faith because I am not seeking to profit from it. The model is still in my possession and will remain so – it is not for sale.
Building the model |
|
The C3’s were of welded construction. This simplified matters quite a lot as I did not need to plate the model. Welded ships have smooth hulls, where riveted ones were quite lumpy. To illustrate this, I attach a photograph of the side plating of the Union-Castle passenger liner EDINBURGH CASTLE which I took whilst I was serving aboard her in the early ‘70s. The hull was build up bread-and-butter fashion from quarter inch obeche. The under water red was red primer from Halfords (Automobile accessories, U.K.) It comes in either normal cans, or spray cans. The black hull and decks were Chroma Artist Colour. These are water-based paints and can be thinned down if required. They dry in about ten minutes and are ideal for such modellers as myself who are very impatient. The junction between the red and black was painted as accurately as I could, but was still far from perfect. I overcome this by sticking a very narrow (About 1mm) strip of paper masking tape along the junction. The strip can be prepared quite simply. Stick the masking tape to a smooth surface such as an offcut of clear acrylic (Left over from making a display case). Blacken it with a broad-tipped fibre pen and cut out a narrow strip for application to the model. Masking tape is very sticky and appears to be quite permanent. The model is now a number of years old and the tape is not lifting. The RHODESIA STAR, in keeping with a lot of older ships, had a lot of side stanchions around the accommodation. These were etched from 2 thou’ brass shim, a simple and inexpensive process requiring no special equipment, which I will discuss in a future article (Providing, of course, you still want them!). The numerous Samson posts were of fine brass tubing which fit over “stubs” as described in the previous article (Schooner VICTORIA). The tops of the posts were turned in the lathe. For this, a piece of brass rod with a diameter slightly larger than that of the post was used. First, the end was turned to a diameter suitable to fit into the top of the hollow tube forming the post. The “button” was then “parted off” by holding a fine jewellers saw against it whilst in the lathe. In the thirty-odd years I have been using my model maker's lathe (A Unimat S-L), I have never been able to part anything off successfully with the parting off tool! The resulting brass pieces were then glue into the top of the posts with superglue. The derricks were all made from tinned copper wire. The required thickness was selected and the wire stretched slightly by putting one end in a vice and heaving on the other end with a pair of pliers. This makes it perfectly straight. It can then cut off to the correct length with a jewellers saw. I spray painted the derricks with white matt primer (Halfords). Again, I use this type of paint because it dries hard within minutes. The ship also had a fair number of cowl ventilators aboard. These items have given model makers headaches for decades. I have seen so many different methods from using old pipes (Large models) to bent pins or nails in smaller ones. I make the larger ones in two pieces, the shaft and the cowl, from brass rod. Both pieces are soldered together. Smaller ones are made using a different method, but neither are complicated. These will be dealt with in later articles. As you can see, the model shows the full hull and is mounted on two turned brass pillars. The pillars are not difficult to make. Place a piece of solid brass in the lathe and drill a hole down the centre of sufficient size to take the steel pin which goes into the base, through the brass pillar and into the model’s hull. The shaping of the pillar is achieved by simply holding a round file against it whilst in the lathe. Part off with a jewellers saw or junior hacksaw. Needless to say, when using a lathe always wear safety goggles as occasionally the work piece will fly out unexpectedly! ---0--- |
|
She was sold out of the Blue Star fleet in 1967 and became the HONG KONG KNIGHT, International Export Line in the C. Y. Tung group and registered in Panama. The was sold for scrap late in 1973 and arrived at Kaosiung on January 1st, 1974. Demolition commenced shortly afterwards.
Regards, Bob Wilson |
|
|
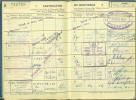
 The first page of my discharge book. |
|
|
|
|


