|
|
|
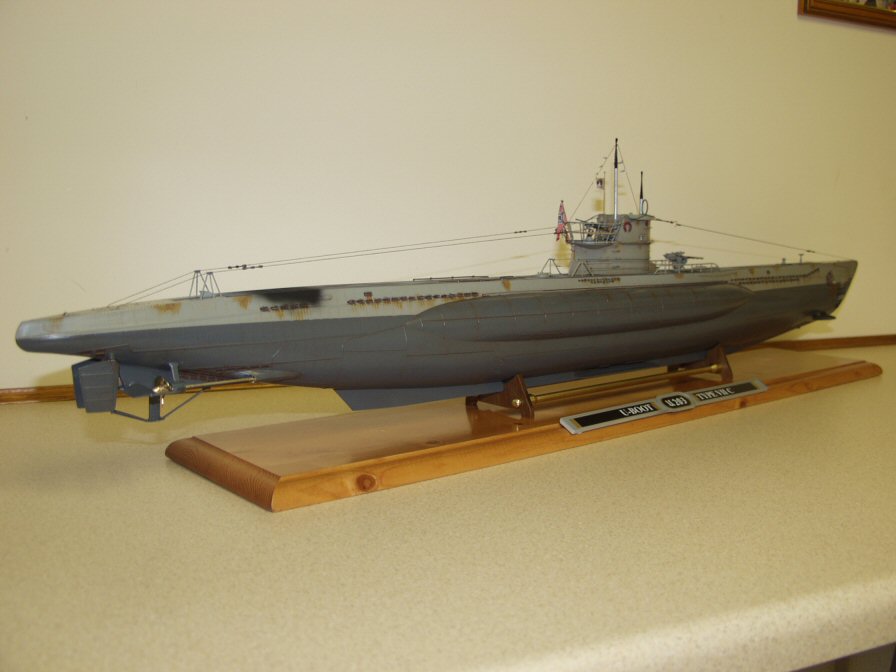
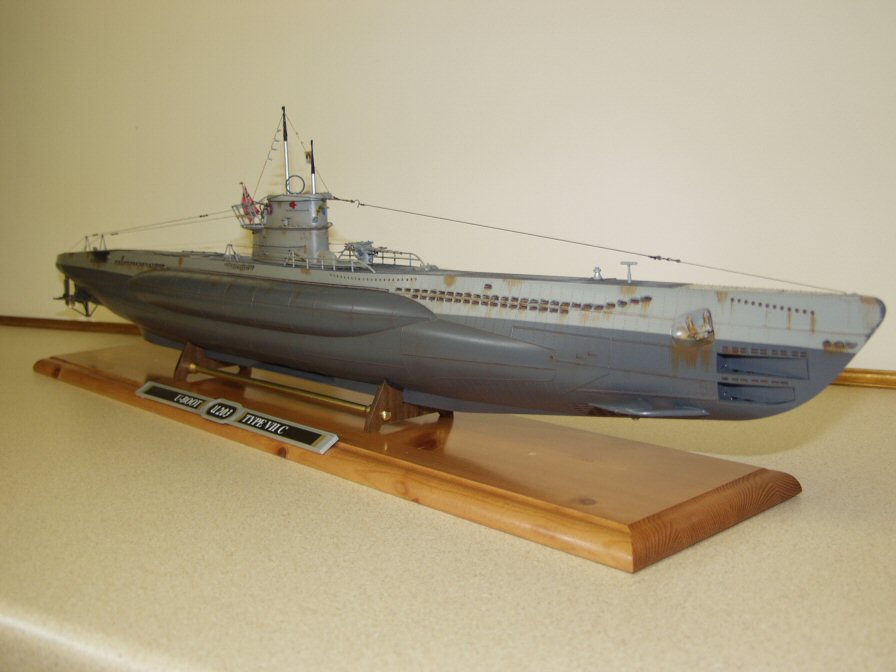
"Another Revell Type VII"
Richard ( aka
Bunkerbarge)
http://www.modelboatmayhem.co.uk/forum/index.php?topic=2227.0
|
|

|
As there seems to be a number of Revell U-Boat models here I thought I
would copy my build thread from the forum where I originally posted it. I
have reworded bits and checked it but apologies for any inconsistencies in
the writings!!
Well I fancied a bit of a break from gluing bits of wood together on the
bridge of the Ben Ain so I went out and got myself a kit that I have
fancied ever since it came out and that is the Revel 1/72nd U-Boat. I also
fancied a bit of plastic modelling, which I have not done now for a long
time.
A superb kit in its own right but my imagination was fired up with the
March 2005 issue of Model Boats magazine where they motorised one as a
surface running model. I was actually involved at one point with buying
that very model but the guy backed out at the last minute which was the
final push I needed to get my own. Since then they have also run an
article showing a dynamic diving version but, for this to work, the model
has to be ballasted to the deck level so no-one ever gets to see so much
of the boat when it is in the water. I wanted a surface running boat at
its normal de-ballasted water line.
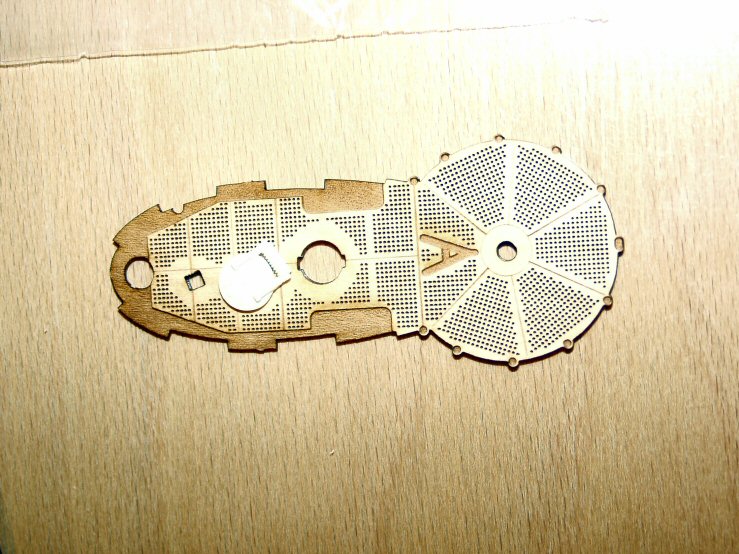
I also wanted to improve the basic kit as much as possible so I purchased
a laser cut wooden deck set for it and a brass PE set from White Ensign
models. Both these items arrived the very next day so off I trot to buy
the model from my local model shop.
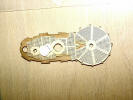
The wooden deck is superb but to get the best out of it the steel deck
ends should be cut from the original plastic deck. This requires a bit of
care and attention but the effect is well worthwhile. I have also arranged
the RC components to ensure that the minimum amount of deck requires
removal which means the shafts are a lot longer than the arrangement in
the magazine but my model will require only the centre section to be
removable and the aft steel section. This is a big improvement on the
magazine kit which had two additional hatches cut in the deck.
I will post a few pictures of the construction later so that members can
see how I have converted this kit to a working RC model.
|
|
 |
|
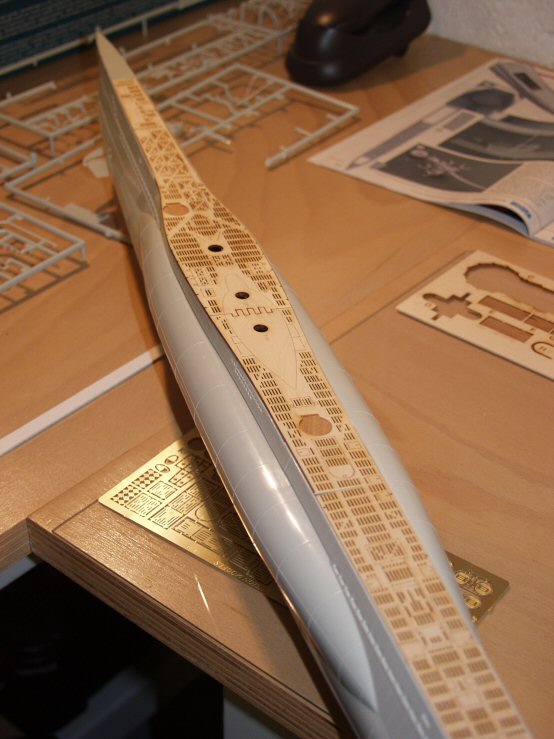
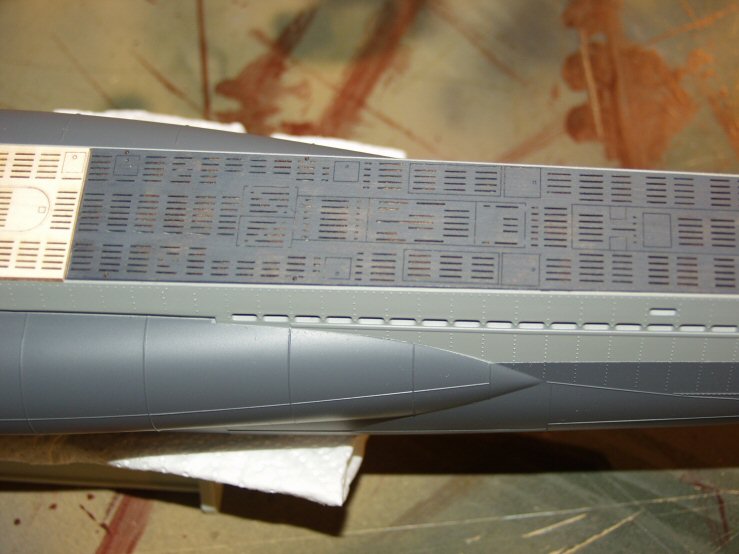
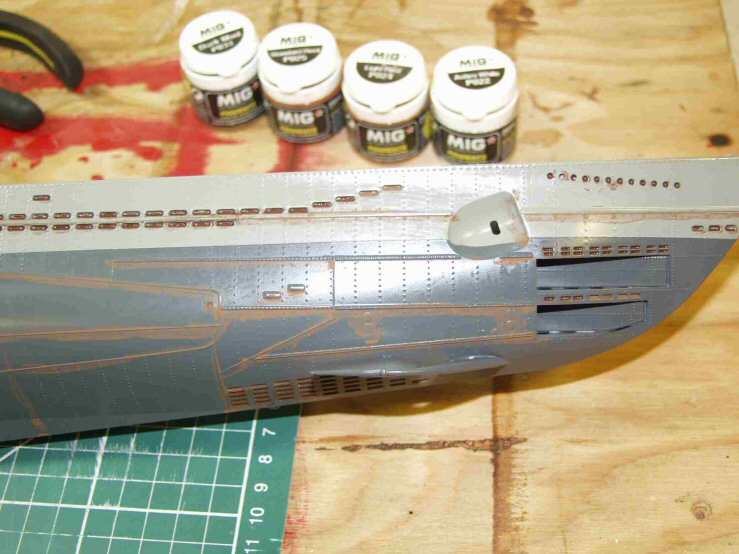
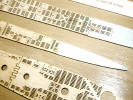
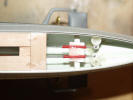
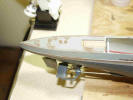
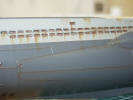
The wood deck is a vast improvement over the plastic original. It fits
well, has better detail and looks superb. When used with the original
plastic steel deck ends the effect is very realistic. I am not going to
bother with any of the other detail sets as they are very much more
diorama orientated and not suitable for a working model.
One main advantage for me is that I will varnish it with matt clear, then
overcoat it with matt black, as per Kriegsmarine practise, then I will
scuff it away carefully with wire wool. This will let the wood show
through and I am hoping will look very effectively weathered.
|
|

 |
|
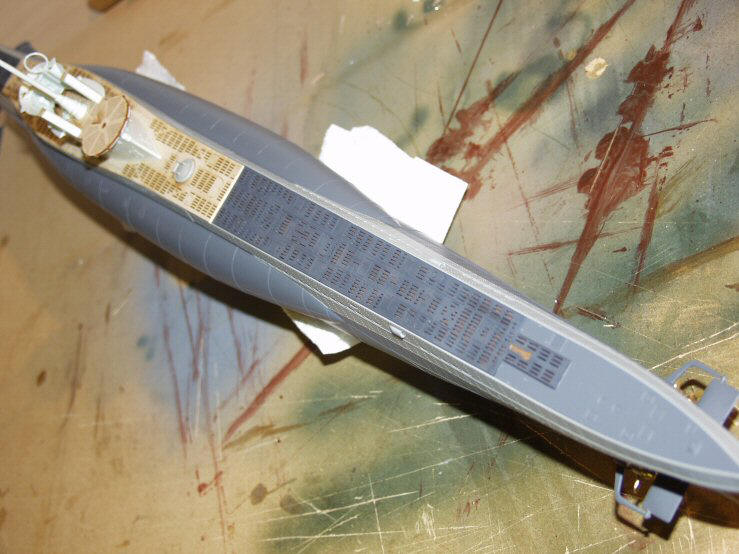
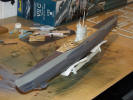
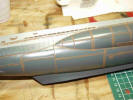
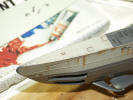
Just a couple of pictures showing the progress of the Sub. The wooden deck
is not going to be fitted until the ballast has been secured and the back
of the deck requires sealing off to prevent the ingress of water. I think
I am going to use varnished brown paper for that.
I am extremely pleased with
the wooden deck set and the PE set from White Ensign models which have all
fitted perfectly and have made a vast improvement on the stock kit.
|
|


 |
|
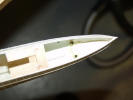
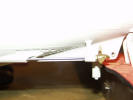
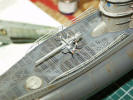
As with so many of these bright ideas it has taken quite a bit longer than
was anticipated to do this model.
On the second picture you
can see the brass rudder bushes fitted with araldite which are a nice
sliding fit on the brass tube used for the rudder posts.
I have now manufactured a
base to mount the two motors and steering servo inside the centre section
of the sub. I have installed an additional bulkhead to seal off the radio
compartment at the aft end, just in case, and I now have the basics of the
running gear installed.
I used brass shaft tubes for the 2mm steel shafts and aircraft control
wires for the rudder servo linkages. I added supports for the servo wires
and made a lead in to ensure the piano wire enters the rudder horns at the
correct height.
All in all it is coming along nicely but, as I said, is taking a lot of
time to do. I am now turning my attention to the rest of the electrical
installation before getting the underside painted and the rest of the
model completed. I have hacked around an aircraft battery to make a 7.2 V
Ni-Cad pack which should assist will ballasting nicely and give plenty of
run time for the two small motors.
Ballast is going to be a total of about 12-1300 grams minus the radio gear
and running gear so I am anticipating requiring about 900 grams of lead
sheet in the bottom of the model. |
|


 |
|
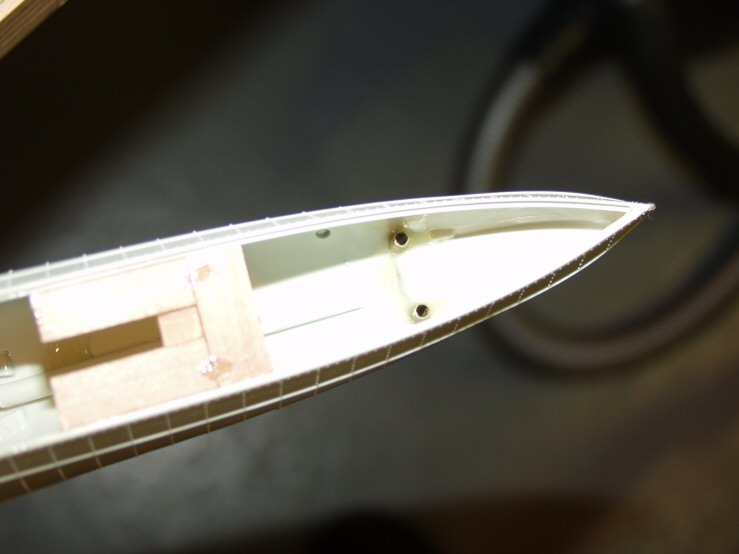
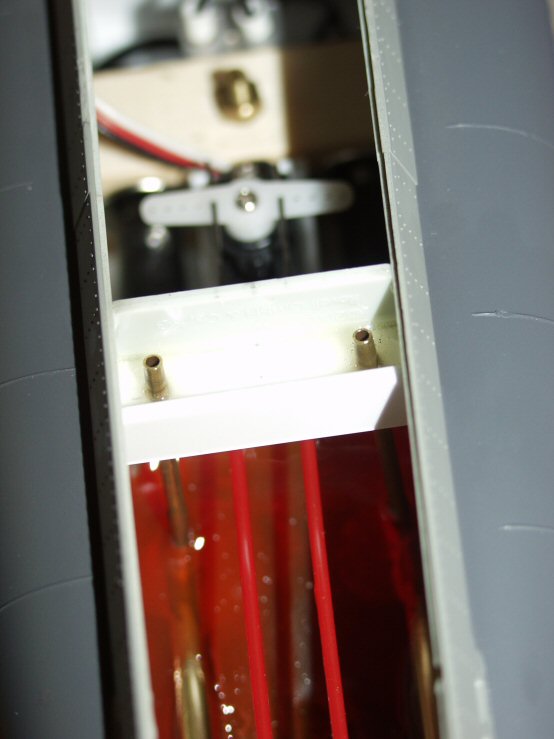
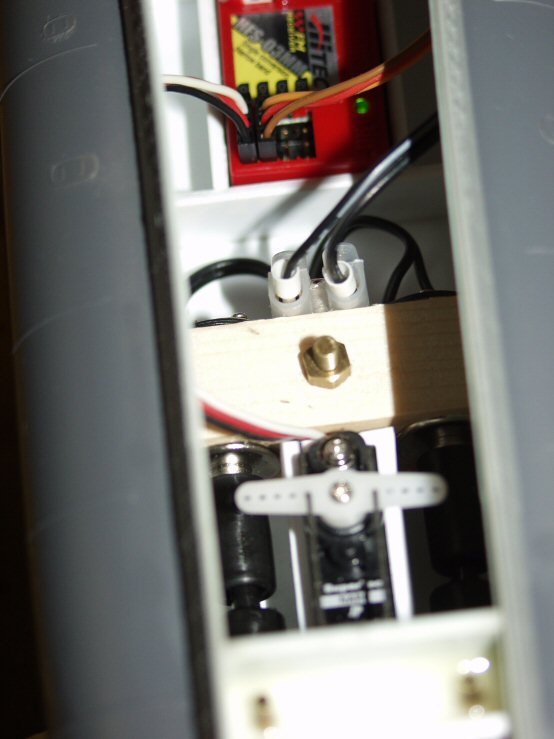
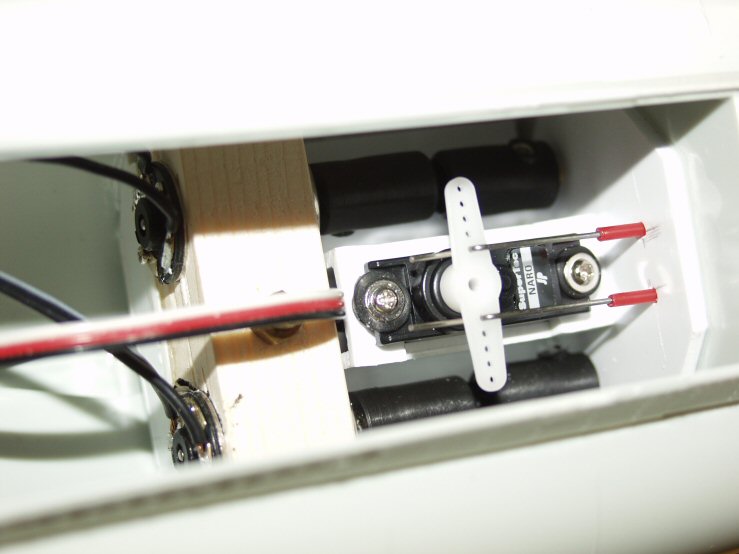
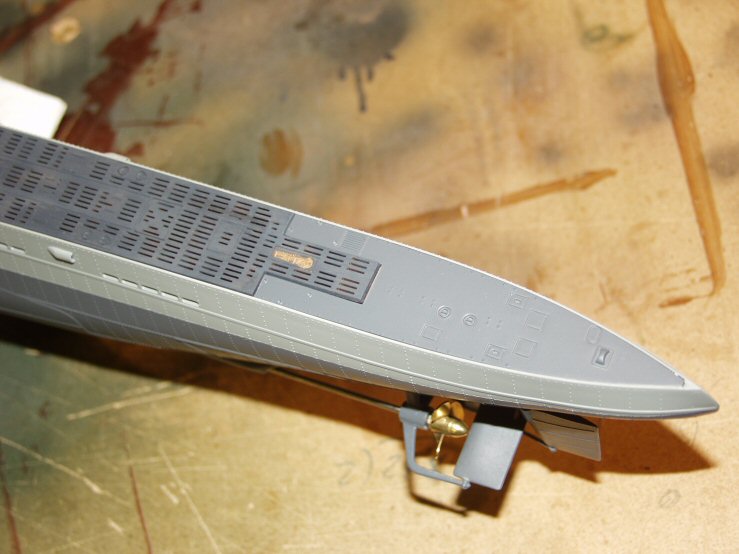
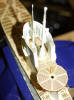
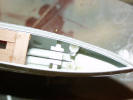
Well the sub has progressed nicely but, as always, has taken a lot more
time than was anticipated.
I now have all the workings installed and tested after a lot of messing
around and fiddling. I wanted to make sure that the deck had the minimum
of openings so I have arranged for one main access through the deck in way
of the centre section around the tower. Either end of the deck I am going
to glue in place with the far aft steel section being the only other
removable piece to allow access to the rudders.
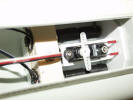
This required the motors to be in the centre section and so the tubes were
10" long with 12" long shafts. As these were 4mm tubes with 2mm shafts the
fit had to be spot on as any slight misalignment would cause interference.
I also checked with the shaft manufacturer what lubrication I should use
and he assured me that silicone grease would do the job. I had asked as I
was concerned that such small shafts, so long and connected to very small
motors might be a bit of a struggle.
As it happens I was correct and after installing the shafts and filling
one with grease I discovered there was no way the motor was going to turn
it. So all the grease had to be removed, remember pipe cleaners?, and I
retried with light oil. It worked fine but leaked from the end so I
realised I needed an oiling tube and grease on the bearings.
The pictures show the set up as it became with two oiler tubes fitted to
the shafts, not easy after they were installed, and the motor and coupling
set up. The motors are mounted in a piece of wood, drilled with two 16mm
holes on 31mm centres then cut in half to form a clamp. This holds the
motors nicely and the only concern I am left with is the very poor quality
couplings which are so far out of balance as to cause vibration. They will
be replaced in the future but will do for now.
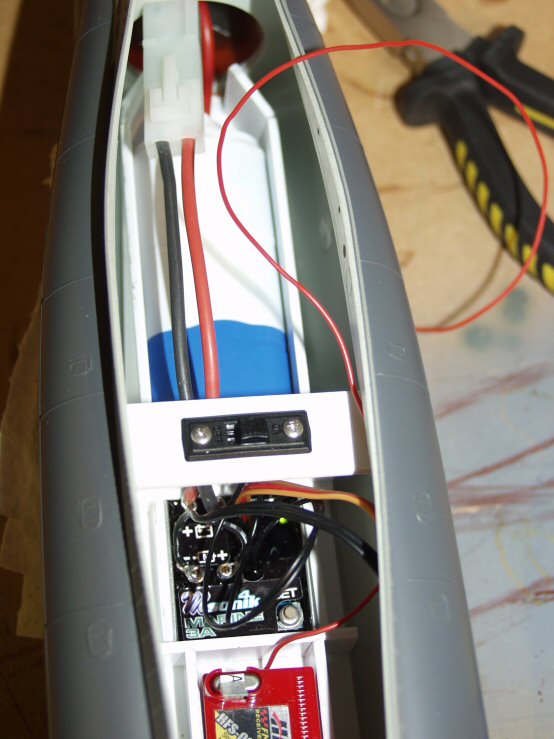
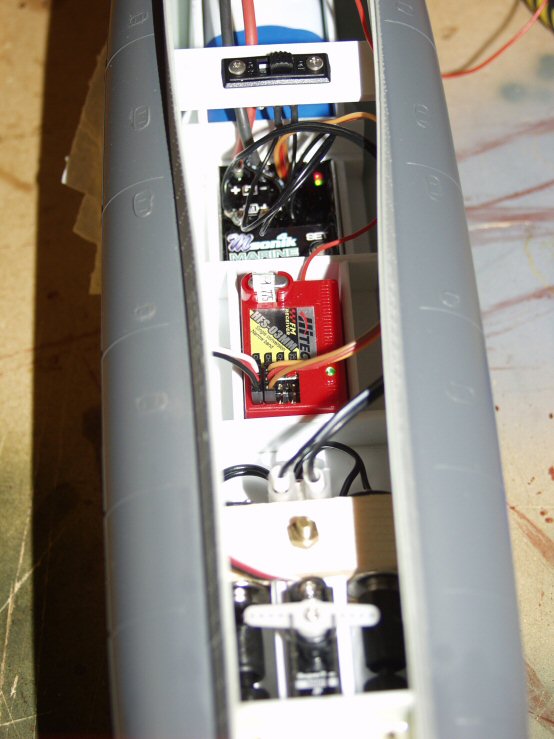
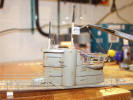
The rest of the installation includes a micro receiver from Hightec, a
nice solid state 1 amp speed controller with switch and a battery pack
made from one of my old 9.6 volt aircraft packs. I removed two of the
cells to make a 7.2 volt pack which fit very nicely in the front of the
boat.
All this lot was installed in a tray manufactured from plasticard on the
workbench, before fitting into the hull.
Ballast was made from lead sheet cut into thin strips, which fit into the
keel very neatly and wider lead strips laid over the top of those. All the
ballast was secured in place by pouring resin over the top of it in stages
to reduce the heat build up when curing.
The pictures show the various components as fitted in the tray and after
the final sea trials in the domestic test tank.
The hull has been sprayed with Tamiya acrylic spray tins which proved to
give a superb finish. The only problem seems to be that there is not a
great deal in each tin, which very nearly caught me out. The dark grey has
had three coats and the tin was empty when I finished. I hope I will have
enough of the lighter grey for the tower and deck fittings and I have a
pot of very dark grey for the decks.
|
|
 |
|
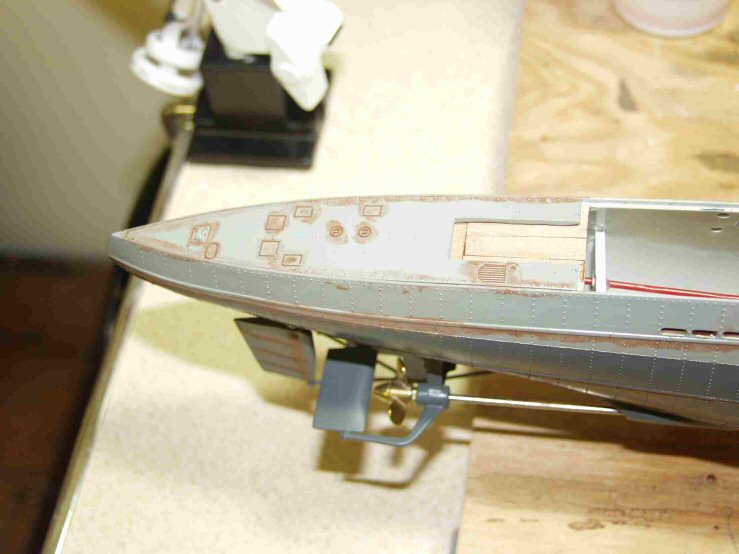
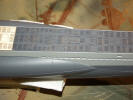
Well I have now had a go at the first two deck pieces and I have to admit
to being quite pleased so far with the results.
First I glued strip wood to the underside of the deck to give it strength
and to seal the holes against the ingress of water. I then gave it a coat
of satin yacht varnish top and bottom making sure that the coat on top of
the deck remained quite thin to prevent hiding the detail.
When that had dried I gave the upper side of the deck a coat of Tamiya
acrylic German Grey, once again making sure that the detail wasn't
covered. The weathering will be done later when I bring out the detail
with some shadows, scuff some of the grey away to reveal the bare wood
underneath and add salt efects with some pigments. This will then be
coated with a final covering of sprayed matt varnish.
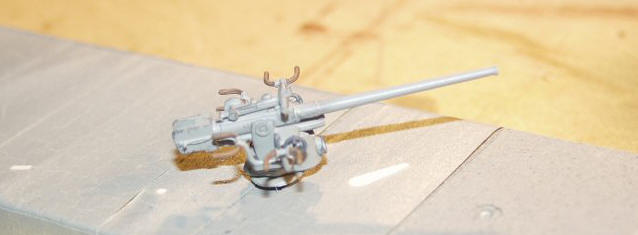
The two deck pieces will be glued onto the hull next leaving the centre
section with tower, deck gun, railings and hatches as removable to enable
access to the RC gear.
|
|


 |
|
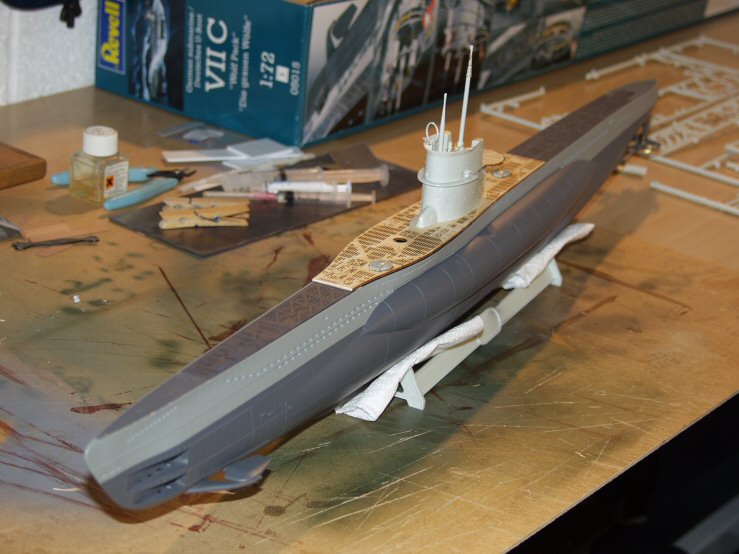
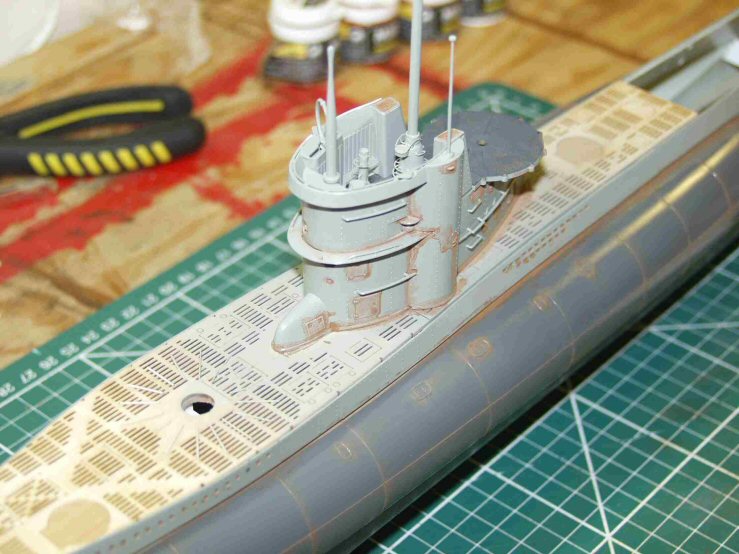
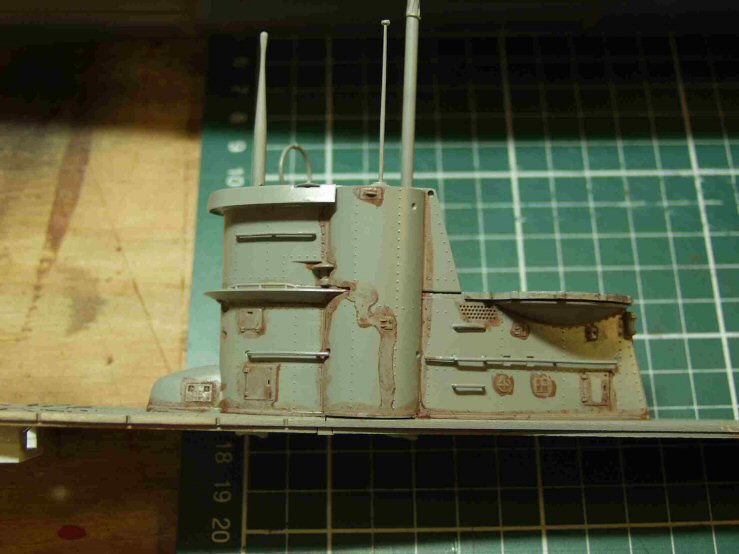
Well after a period of settling in at home I decided to turn my attention
to progressing the Revel U-Boat.
I had, of course, made a rod for my own back by using a PE set and a
wooden deck set for the model, both of which ideal for a static model but
both presented their own challenges for a working model.
The PE set proved to be very intricate but did enhance the detail
tremendously on the bridge. It also meant that I had to then be extremely
careful when handling the pieces during construction.
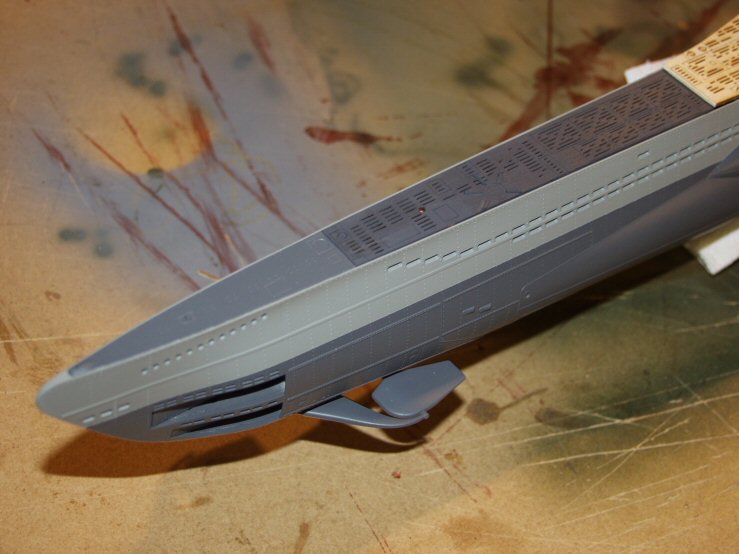
The wooden deck was a whole different ballgame though. Firstly I decided
to use the original plastic deck ends where the original is steel as
painted up the plastic would be far more realistic than the wood. Then the
wooden deck was split in the middle however the arrangement I had gone for
required the ends to be fixed to the hull and the centre section, complete
with tower, would need to be removable. I arranged this by fitting the
centre section with a tongue at the aft end and used a screw below the 8.8
cm gun to hold down the front. The other main consideration with the wood
was that the laser cut holes had to be sealed at the back so that water
washing over the decks would not enter the hull. I did this by fitting
lengths of stripwood to the back, glued in place with waterproof PVA, and
varnishing the surface with yacht varnish. The backing had to go close
enough to the edges to seal all the holes yet leave a small step and
enable the deck to locate in the step in the hull.
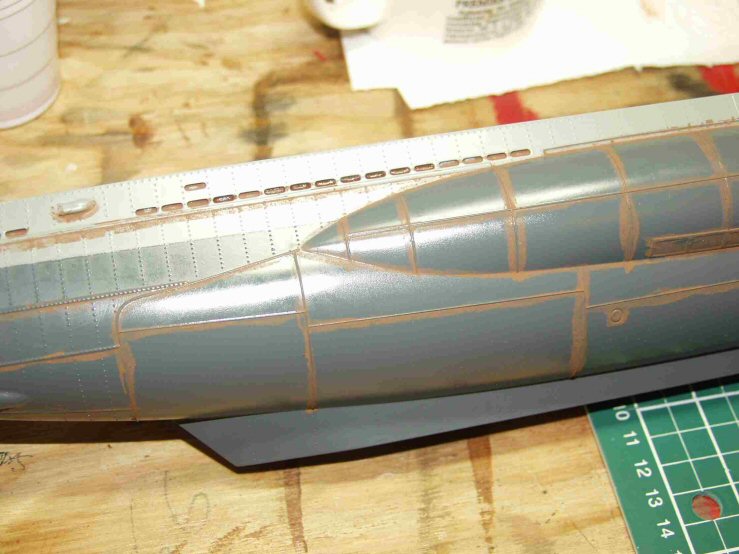
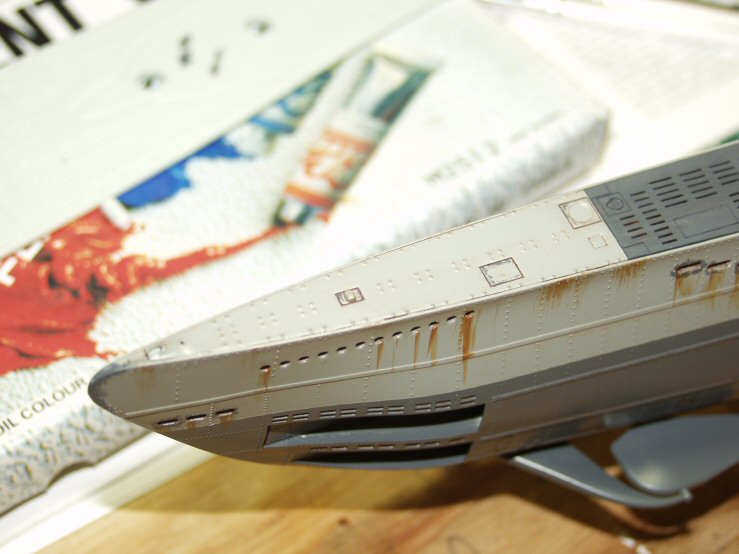
The next stage was to start the weathering process. I wanted to use a wash
so first I painted the entire hull and tower with a coat Future. Once that
was dry I applied a wash of pigment mixed with water and a spot of washing
up liquid. Unfortunately the majority of the detail is raised and not
recessed however washes can still be used to give a degree of shadow to
raised detail. When the wash was dry I removed it with a dry paper towel,
taking care not to remove too much around the raised detail.
|
|
 |
|
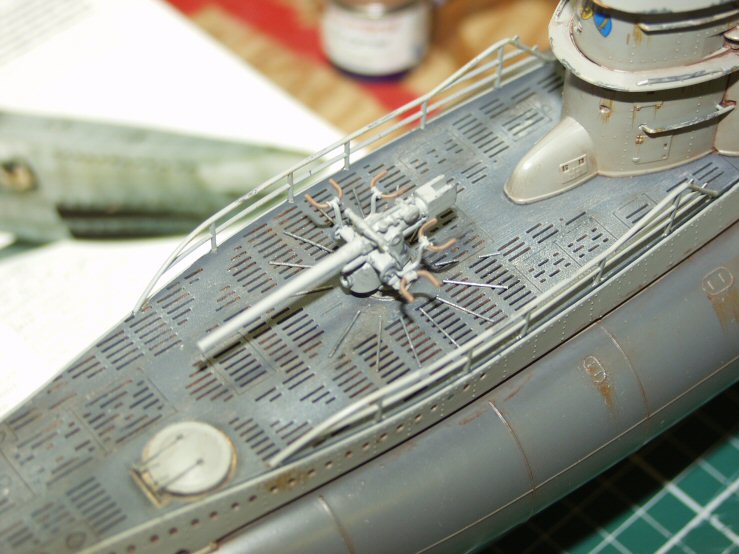
The next step in the
process was to try to simulate paint chippings, which I did on the light
grey finish only.
Unfortunately I still feel that I have a lot to learn with this technique
and I am not happy with the finished effect. When I look at how they do it
in Tamiya Model Magazine International I think I need to use an even
smaller brush than I did. Modelling is a continuous learning process and
this is something I need to do a lot better with.
Anyway it stands as I it did as a part of the learning curve and I moved
on to adding some rust effects. I am a lot happier with this and decided,
based on the scale, to use a dry brush technique. It is very difficult to
decide just how much to do with rusting, particularly with U-Boats, which
seem to range from freshly painted to absolute wrecks in my photo
archives. I went for something that I hope is somewhere in the middle and
I hope it doesn’t look too much.
Anyway after the paint chipping was done and the rust added it was time to
coat the entire hull and tower with a matt clear topcoat. I used a large
spray tin on a waterproof Acrylic matt varnish and put three coats on.
Taking care to get the varnish into all the recesses where the wash was
residing.
The next couple of pictures show the hull at this stage before moving on
to adding the remaining detail to the tower.
|
|


 |
|
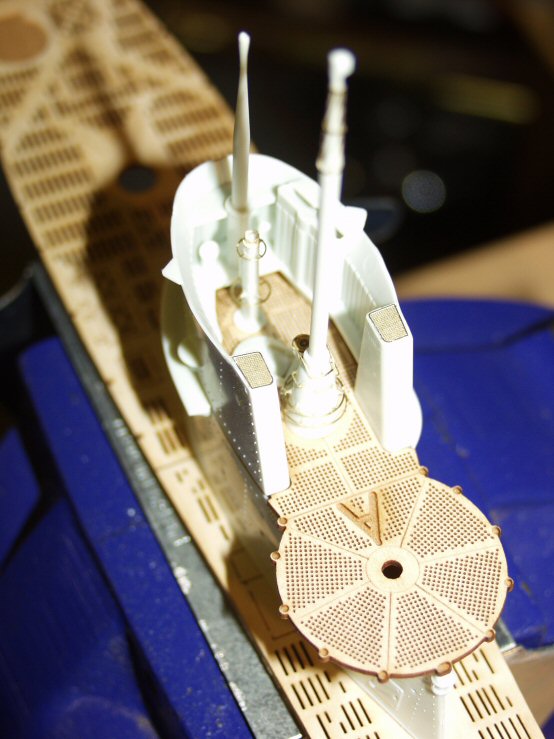
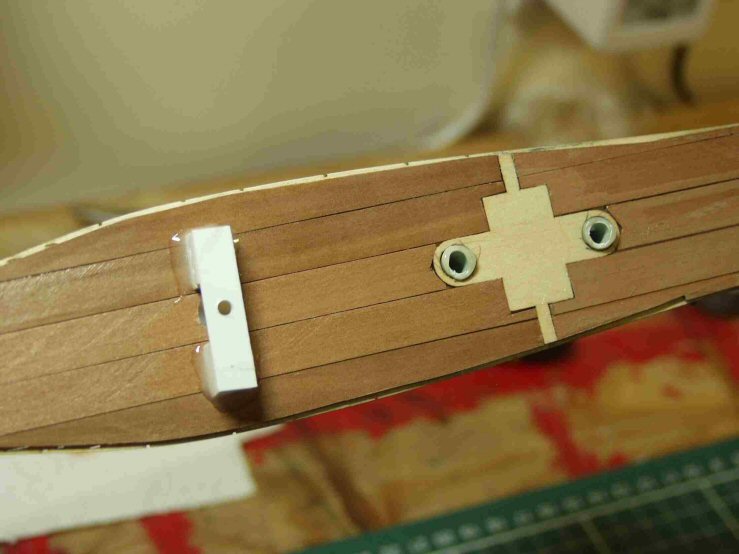
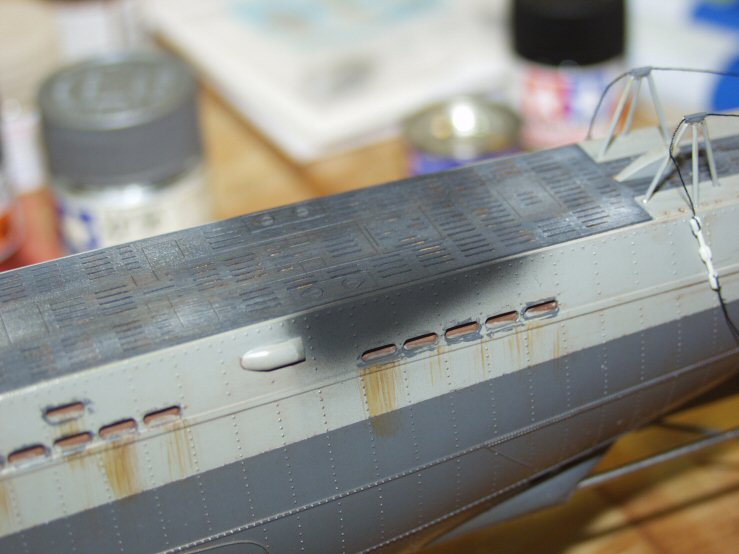
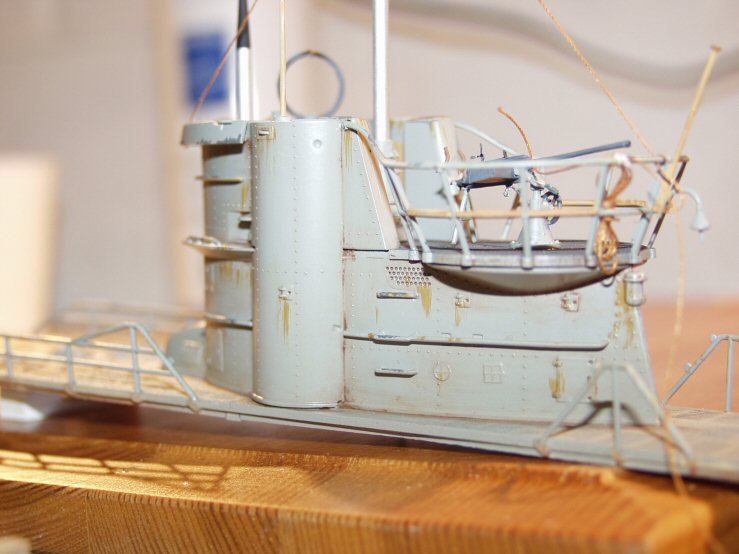
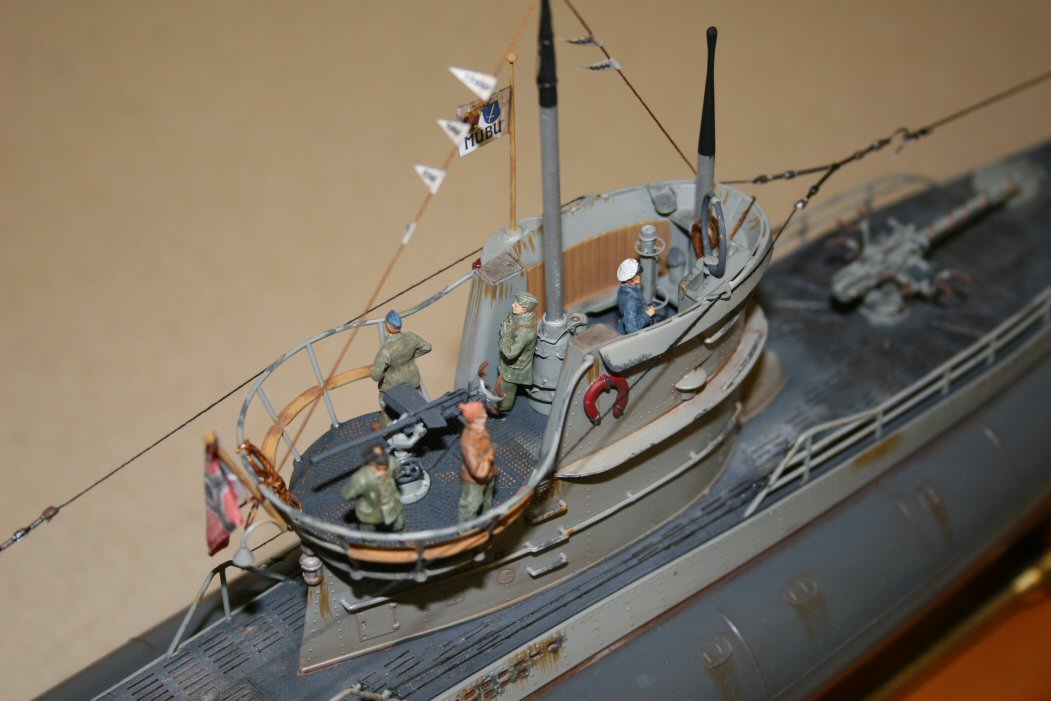
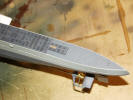
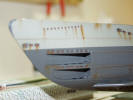
Well today I worked on getting all those little bits and bobs finished and
getting the deck looking as I wanted it.
The whole idea of the expense of the wooden deck was so that the laser cut
holes would look neat and the wood texture would look far more realistic
than the plastic original.
After the original coat of matt dark grey was applied, the real decks were
coated with a matt black paint, I made up a wash of very thin brown enamel
paint. This was painted over the recessed detail and then immediately
wiped away with my finger. This left the wash in the detail and it also
shaded the deck colour nicely.
When that was done I then dry brushed matt white in patches over the deck
surface. Being a wooden deck regularly submerged in sea water just about
every picture I can find of a U-Boat deck shows very clearly white salt
deposits on the deck. I have never seen this simulated on a model yet so I
particularly wanted to show this effect.
The final effect on the deck was a gunmetal dry brush over the areas of
the footholds around the 8.8 cm gun and the capstan, which was actually
scuffed pieces of metal on the real boats. I made these out of stretched
sprue and plasticard.
I then added a soot deposit in way of the diesel exhausts with an
airbrush, which is really the only way to generate such a softly shaded
paint effect.
When this was done I have to say I was really pleased with the overall
effect of the deck. The detail looks crisp and the weathering looks quite
realistic and nicely contrasts with the steel areas of the deck and hull.
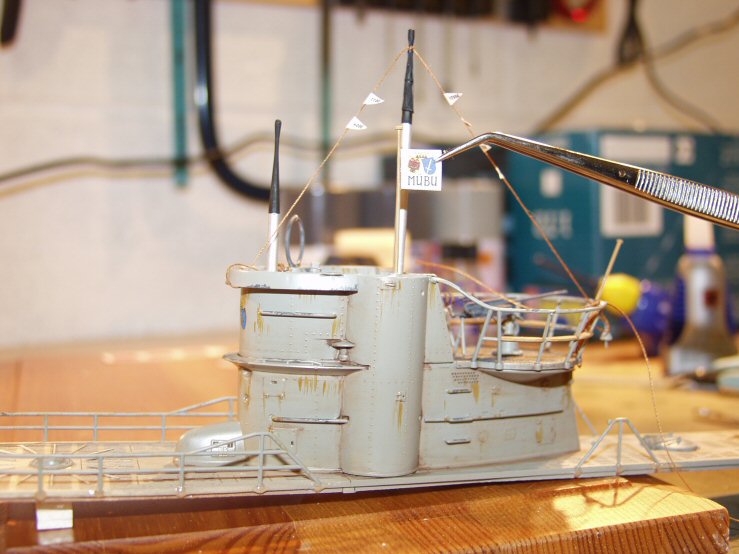
The rest of the day was then spent adding bits of detail and attending to
the rigging. The rigging was a bit of a challenge, as it has to be
removable to allow the removal of the centre section. I incorporated a
section of rubber cord into the forward wire and a hook so that the
rigging can be released quickly and easily. The centre section will still
be attached by the aft wires but it can be conveniently sat on the aft
deck when removed.
The final couple of bits remain to be completed such as the hand rail
wires and the making of the stand, which should be completed tomorrow and
the final touch of a few crewmembers may well be done during my next trip
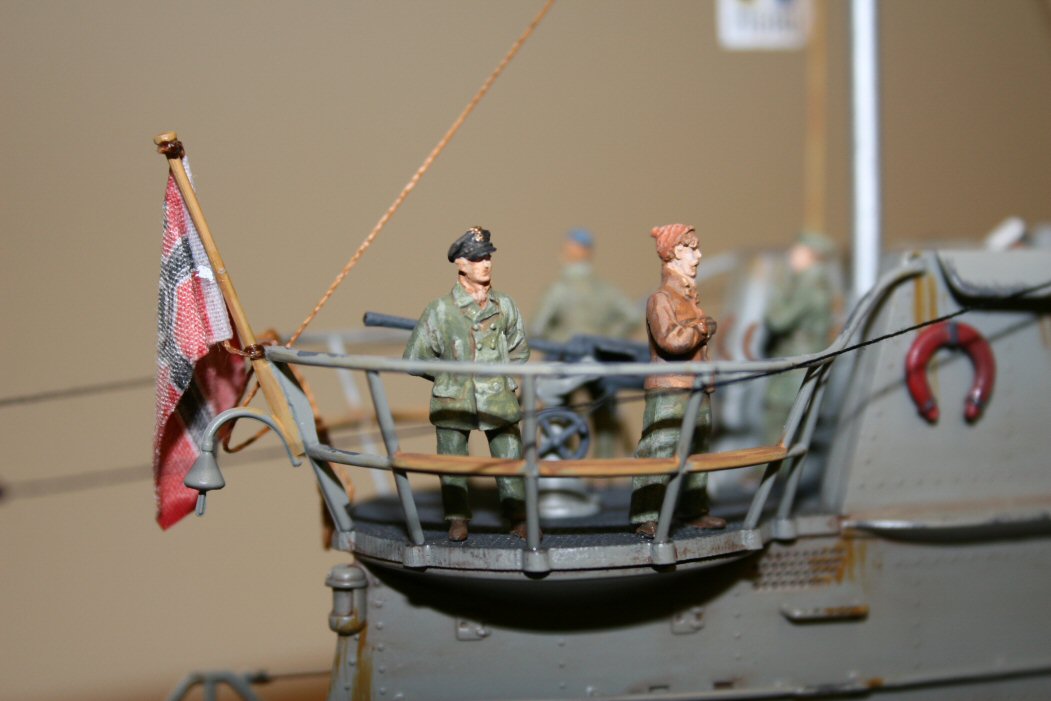
away. I am hoping that my flag (including Swastika!) from BECC will arrive
soon to finish off the detail of the bridge.
|
|


 |
|
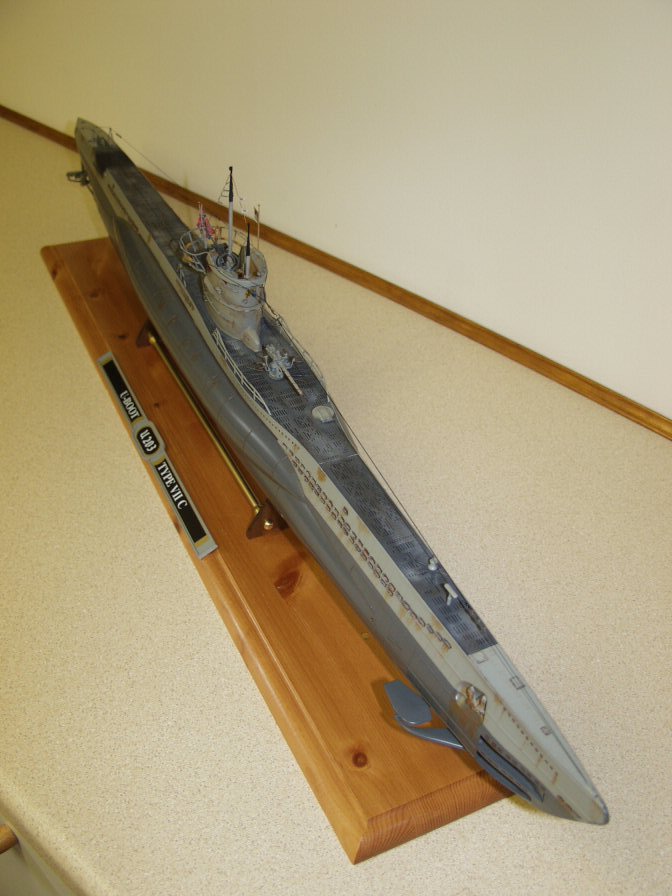
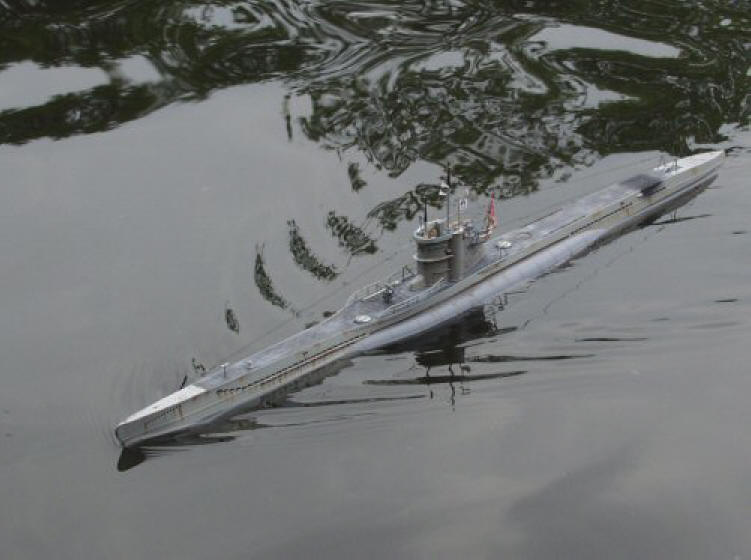
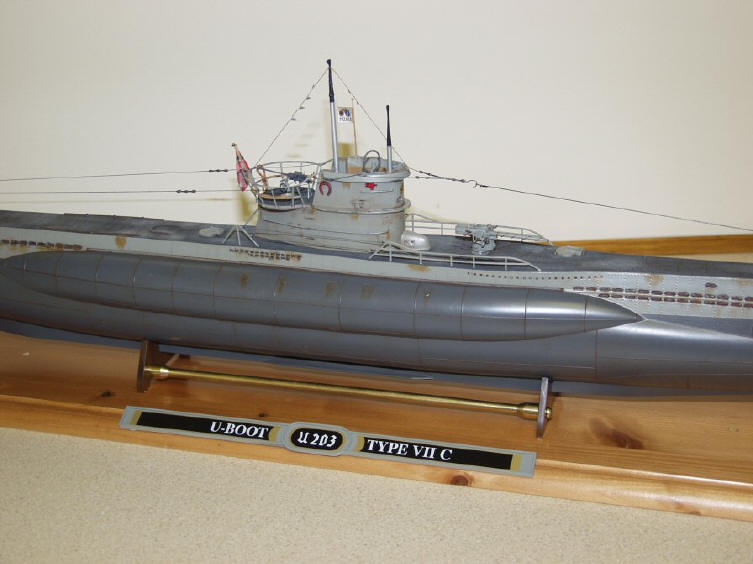
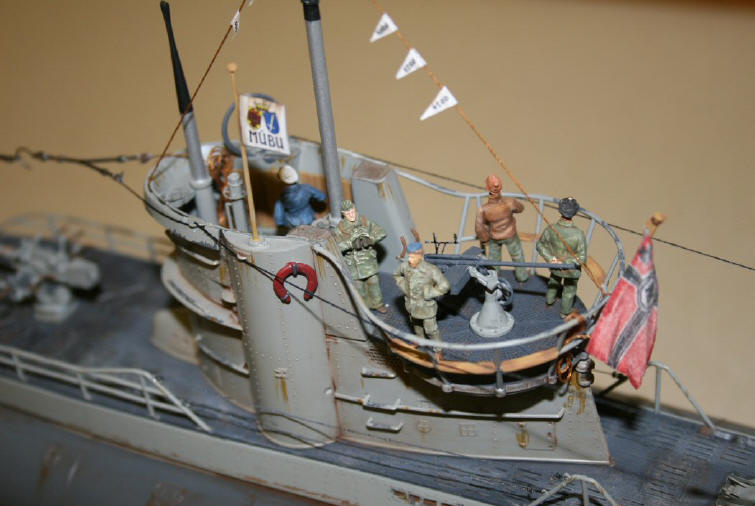
I actually got the flag from BECC today so that was the last peice to be
fitted. It certainly is a vast improvement over the original, and it has
the correct Swastika on it of course.
The only remaining thing now is to paint and fit the figures but I think I
will do them on the ship next time.
Apart from that it is now finished, had her sea trials and will be going
with me to the pond tomorrow.
The finishing touch was a stand which was made from a couple of peices of
mahogany, cut to the original stand verticals, two brass bars with turned
down brass screws to hold them into the uprights and a base of yet another
95p surplus kitchen drawer from from a garden centre.
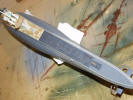
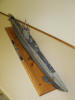
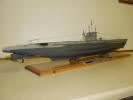
So a couple of finished pictures to end the project. I can't remember the
last time I actually started and finished something, scary!!
|
|
 |
|
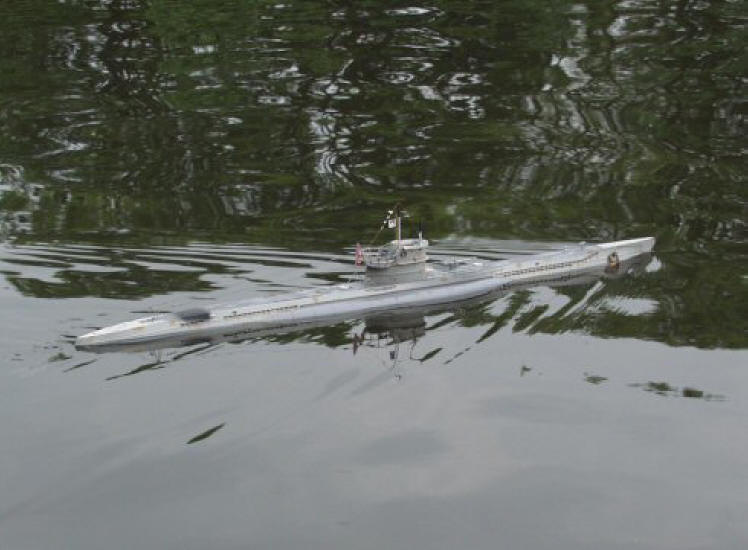
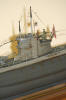
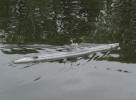
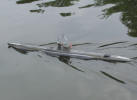
Well the Grey Wolf has been out on her first patrol and I have to admit
she behaved very well.
The speed was above scale without getting silly, the turning circle was
far better than I expected and she floated bang on at the correct draught.
She also proved to be quite stable and battery life was still doing well
at 45 minutes when rain stopped play.
|
|


 |
|
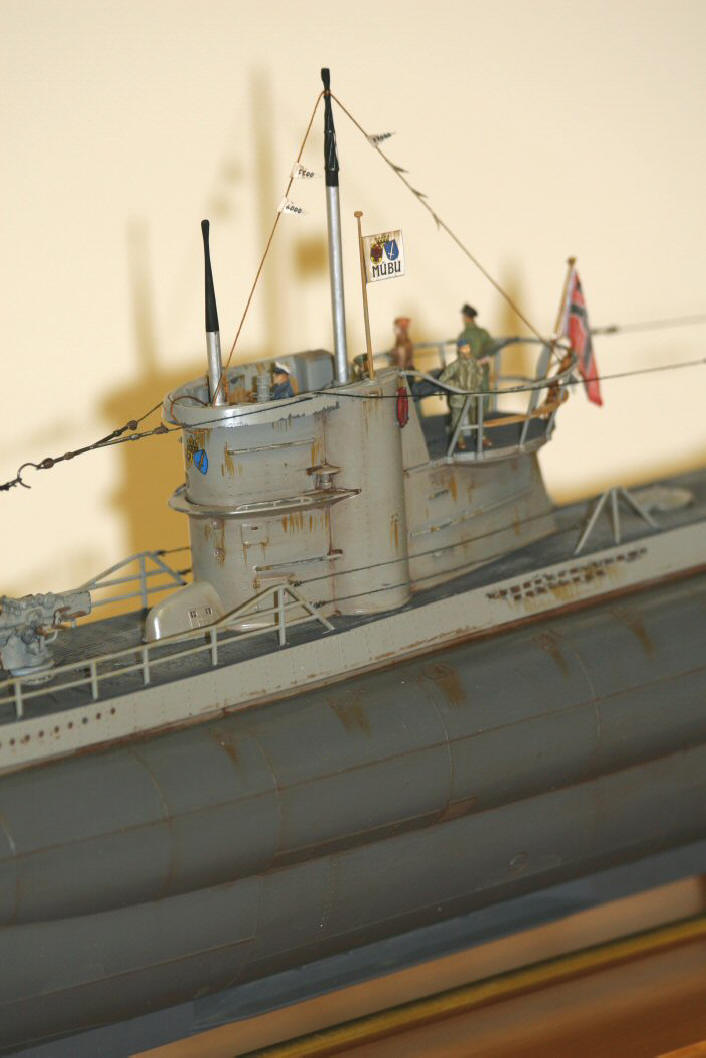
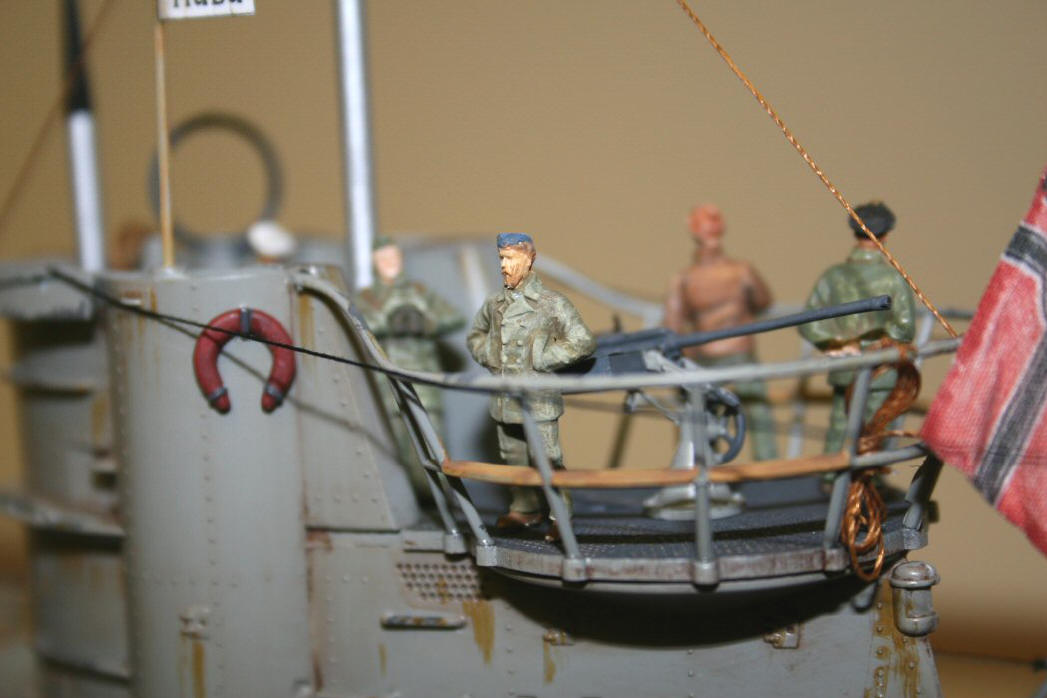
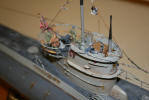
The final chapter in the U-boat saga was to add some figures to the
bridge.
Painting small items is one of the few things I can do on the ship in what
bit of spare time I get to myself so I usually try to tae one or two
things with me and a selection of paints. This time I took some figures
for the Envoy class tug to put a bit of life on her and I took some superb
white metal figures for the U-boat.
They were Heckler and Goros items, purchased from Historex, and the level
of detail is staggering. Obviously I did not have the luxury of a
magnifying lamp so it was up to the Mark One Eyeball and a steady hand.
Now that I have taken a few shots with a very good camera I can see how
the figures do not exactly set any standards and the painting leaves a lot
to be desired but they do enhance the bridge significantly and they do
look good when placed in the bridge scenario.
They also do some very nice gun crew but I particularly wanted my boat to
be in an "entering harbour" mode with the kill pennants flying so gun
crews would not be maning the gun during these times. I also have one
figure left but I am not sure whether I will fit him or not. He is wearing
a complete set of Sou'westers which doesn't look right somehow amongst the
other five who are not and I also don't want it to look too crowded so I
am still undecided.
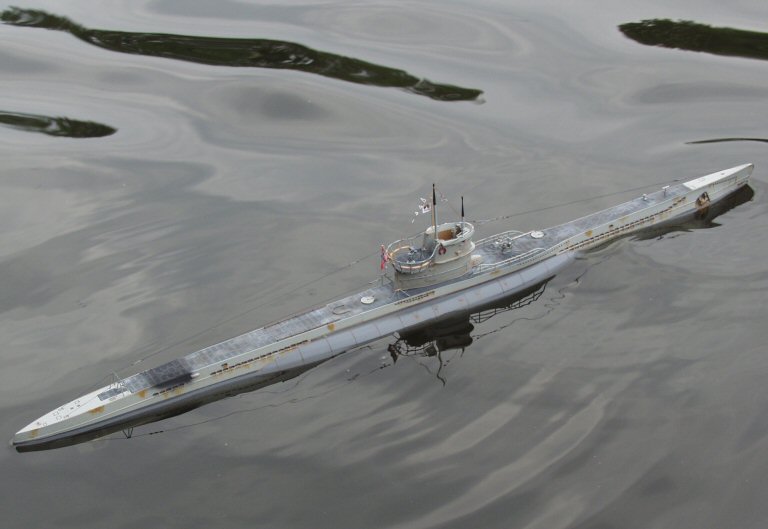
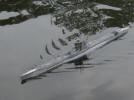
Anyway here's a couple of shots of the finished beast. I took her out on
the pond again last week and she once again behaved perfectly. The only
issue I had was turning her in a pretty fresh breeze when she took a bit
of water over the deck and some got inside. I am not going to make any
modifications as the deck kept the majority of the water out and I won't
be sailing her in such conditions again anyway. She really is a
fair-weather vessel but with just a bit of a swell she looks amazing at
speed and makes a perfect wake.
|
|

 |
|
Home
|